


In 2010 Burton released the Burton Riglet Reel to the world and changed the game for kids snowboarding. By creating a tool that allows parents to tow kids around on a snowboard, children as young as two and three are finding themselves standing sideways. Designed to attach to the nose of your child’s snowboard, the Riglet Reel uses a retractable cord with ergonomic handle to pull with.
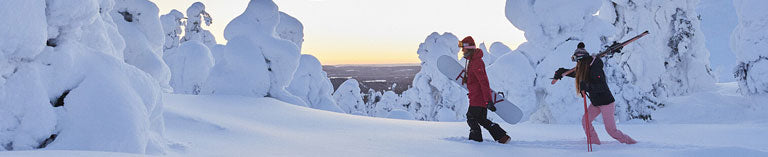
 The Burton Riglet Park was designed to create a fun and engaging environment for kids 3-6 to find success with snowboarding, and get families riding together. Riglet is a concept that Burton came up with which gives coaches flexibility when it comes to teaching. It allows for quicker progression with little work from the child and more fun for the kids right away. The terrain base station allows kids to have both feet stacked into the board, recreating the mountain environment right on a board. Coaches are able to teach kids the fundamental movement patterns kids at this age need to learn which are vertical movement and movement with the foot. It challenges them in different ways in a controlled and safe environment. Kids come out with a self-directed learning outcome leaving them with the confidence they need to spend the day out on the hills with the family. Bring your kids down to Rhythm on June long weekend (11th-13th June 2016 10am - 3pm) to give them a go. They will be well looked after by the Burton instructors, it gives them a great opportunity to give snowboarding a go, especially if it is their first time!
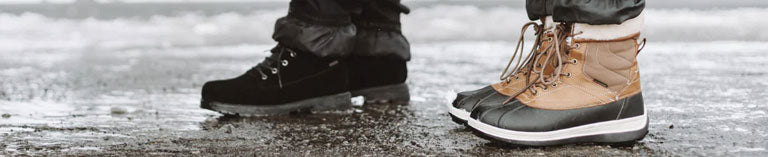
 The Burton Riglet Reel itself is compatible with certain sizes and models of Burton’s youth snowboards. The Burton Chopper, Chicklet and After School Special are all models that are compatible with the Burton Riglet Reel; however, only sizes 80cm-110cm have the pre-drilled holes needed to attach the device. If you are renting a snowboard, Burton Riglet Reels are compatible on the Burton LTR Kids boards sizes 70cm-110cm. The Burton Riglet Board is a great tool for indoor and backyard use. This toy version of a Burton kids snowboard comes with the Burton Riglet Reel pre-attached. How to use the Burton Riglet Reel Step 1: Determine The Nose of Your Child’s Snowboard What your child considers their front foot, points to the nose of their snowboard. If you aren’t sure yet which foot is your child’s front foot, play with putting the Riglet Reel on both sides of the snowboard until they decide on their dominant front foot. Our Burton Kids’ snowboards are shaped true twin. Setup in the middle your child can go either direction down the mountain until they determine which is their front foot. *NOTE* some parents like to put a Riglet Reel on both ends of the board so they can tow their child no matter which way they go. Step 2: Attaching the Riglet Reel Once you’ve determined which end of the board is your child’s nose, go ahead and pull off the little plastic plug on that end of the board. Now that the plastic plug is no longer blocking the holes on the nose of your kids’ snowboard- you can attach the Riglet Reel. Place the large, puck shaped piece (Part C,) against the board so that the screw holes in its back align with the holes on the nose of the snowboard. Holding the Riglet Reel in place, flip the board so you can see where the base of the board’s holes in the nose, line up with the Riglet Reel’s holes. Using your hands, place the screws that come with the Riglet Reel into the holes and turn slowly. Once the screws are as far in as you can get them by hand, tighten with a #2 sized screwdriver until the screws are flush with the base of the snowboard. Flip the board over and grab the Riglet Reel, shaking side to side to make sure it secure does not wiggle. Step 3: Adjusting the Handle Length You can do this step before your child gets on the board or while they stand stationary. When your child is new to snowboarding, we recommend you have them stand on the board to test out the ideal length of cord for your Riglet Reel. While holding your child’s front hand extended, grab the handle of the Riglet Reel, and pull until you are standing upright, but still able to hold firmly onto your child’s hand. Now that you know your ideal length to start pulling your child, here is how you adjust the handle. Holding part A, slide part B of the handle out of the housing so that it is loose on the retractable cord. Wrap extra chord length around the center of part A, keeping in between the barrier guides. Slide part B back onto part A until secure. To change the length again, simply pop off part B and retract or wrap the cord to desired length. Pop part B back onto part A and you’re ready to go! We recommend a shorter distance for younger and newer snowboarders. Extend the cord length as your child develops their skills and becomes more comfortable with the movements. Once they no longer need to hold your hand, it is ideal to extend the Riglet Reel for longer towing time. Step 4: Pulling Your Kids Around Now that you have the Riglet Reel attached to the board, and have extended or shortened the length of the cord for the size or ability of your child, it’s time to get them moving. A few things to consider before you start towing them around. 1. Ask your child to stand in an athletic stance on the board or in the bindings. This means bent knees a small distance apart like they’re riding a horse 2. Make eye contact with your child and have them look up at you or at a fixed point in the distance you plan to pull them to 3. Make sure where you plan to pull your child on their snowboard, where you are going is clear of people and/or unexpected obstacles 4. Ask your child if he/she are ready before pulling. You don’t want to yank abruptly, instead make sure they’re prepared for the movement of the board under their feet 5. Have fun!
  Take it a step further and play with some obstacles you find around your house or in your backyard. Cones or other objects for pulling around are always great for practicing. When your child is ready they may enjoy being pulled over features. Go at your child’s pace and most importantly, have fun! For tips on your Snow Sport equipment stay in touch with us: facebook/rhythmsnowsports instagram: @rhythmsnowsports twitter: @rhythmsnowsport
Posted by Emily Dorahy on


